03.17
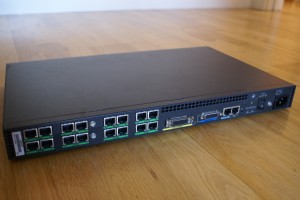
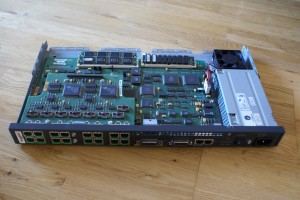
I recently purchased a new piece of kit for the homecomputerlab, specifically a Cisco 2511-RJ router. Although these routers are now discontinued, they do however still come up on ebay from time to time and are the perfect router to setup and configure as a remote access terminal server due to having 16 asynchronous serial ports on board.
What this essentially means is that you can manage up to 16 Cisco devices from a single access server. The only difference is that the ‘serial cable’ in this case has ethernet RJ45 plugs at both ends and one end goes into the console port of the router/switch/firewall you’d like to manage as always, and the other end instead of terminating into a serial port on your pc, goes into an asynchronous port on the access server.
The ‘serial cables’ that are used with Cisco access servers are called rollover cables and they are just standard ethernet cables but with a reversed pin out arrangement. I made my own from some standard Cisco console patch cables as I had plenty of these lying around with just a crimping tool and some RJ45 connectors as you can see in the picture below.
Once you have everything plugged in and connected, from here it is just a simple case of setting up the correct config using the reverse telnet principle.
Current configuration:

!

version 11.2

no service password-encryption

no service udp-small-servers

no service tcp-small-servers

!

hostname Cisco2511-RJ

!

enable secret iddkd

!

username cisco privilege 0 password 0 cisco

ip host Cisco2950T1 2001 10.10.10.10

ip host Cisco2950T2 2002 10.10.10.10

ip host Cisco1760 2003 10.10.10.10

ip host Cisco2621 2004 10.10.10.10

ip host Cisco3550 2005 10.10.10.10

ip host CiscoPIX-515E 2006 10.10.10.10

ip host Cisco877W 2007 10.10.10.10

!

interface Loopback0

ip address 10.10.10.10 255.255.255.255

!

interface Ethernet0

description *** LINK TO HOMECOMPUTERLAB SWITCH #2 - 3COM 2924 (PORT 24) ***

ip address 192.168.1.200 255.255.255.0

!

interface Serial0

no ip address

shutdown

!

ip default-gateway 192.168.1.254

no ip classless

ip route 0.0.0.0 0.0.0.0 192.168.1.254

!

!

line con 0

line 1 16

no exec

transport input all

line aux 0

line vty 0 4

logging synchronous

login local

transport input telnet

line vty 5 15

logging synchronous

login local

transport input telnet

!

end
Once that is done you can connect and manage your ‘remote’ switches/routers/firewalls by using the following commands:
telnet 10.10.10.10 2001
Once connected to the device, you can switch between active sessions by using the following command to bring you back to terminal server:
ctrl-shift-6-x
To manage active sessions you can use the following commands:
show line
If one of your lines is stuck in an Active state (*) or you want to log someone else off:
clear line [line_number]


hi
this is so helpful
kind regards
I bought my 2511 and needed the information you provided here. Thanks man! Appreciate the help. Chuck
I have just acquired one of these and these instructions will be very helpful. Thanks for sharing.
Thank you for this guide.