2013
02.16

I recently had a requirement to add a RDM drive with existing data on it to my ESXi host. Here’s how I was able to do so:

1. Add the disk to your esxi host
2. Log in to your esxi host via ssh

3. Identify the VML ID of the hard disk you’d like to mount:
ls -l /vmfs/devices/disks/
4. Change directory to a local vmfs volume fixed disk where you will create the RDM VMDK mapping file
cd /vmfs/volumes/[Local VMFS VOLUME]/
eg: cd /vmfs/volumes/508c580d-7bc82a54-1d30-009c02a036be/

5. Optional create a RDM directory where the VMDK mapping file will be created
mkdir RDM

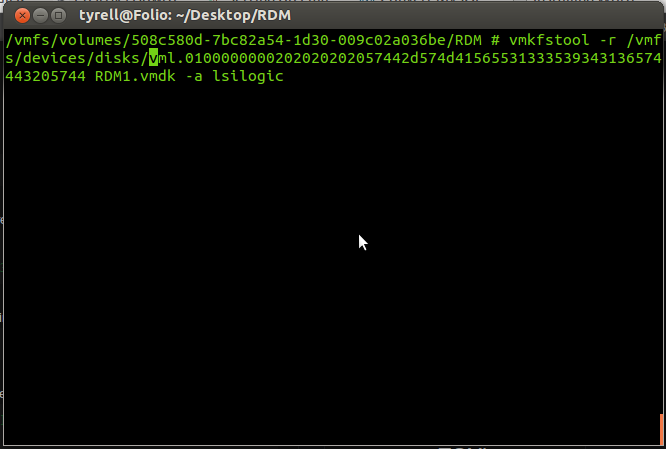
6. Use the vmkfstools command with the -r switch to create a virtual VMDK mapping file to the hard disk
vmkfstools -r /vmfs/devices/disks/[VML ID] [RDM VMDK mapping_filename.vmdk] -a lsilogic
eg: vmkfstools -r /vmfs/devices/disks/vml.0100000000202020{truncated}205744 RDM1.vmdk -a lsilogic

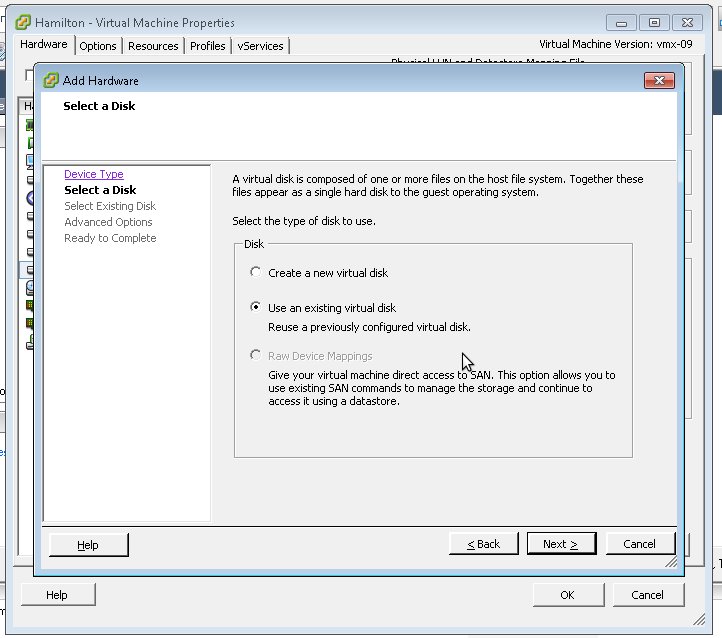
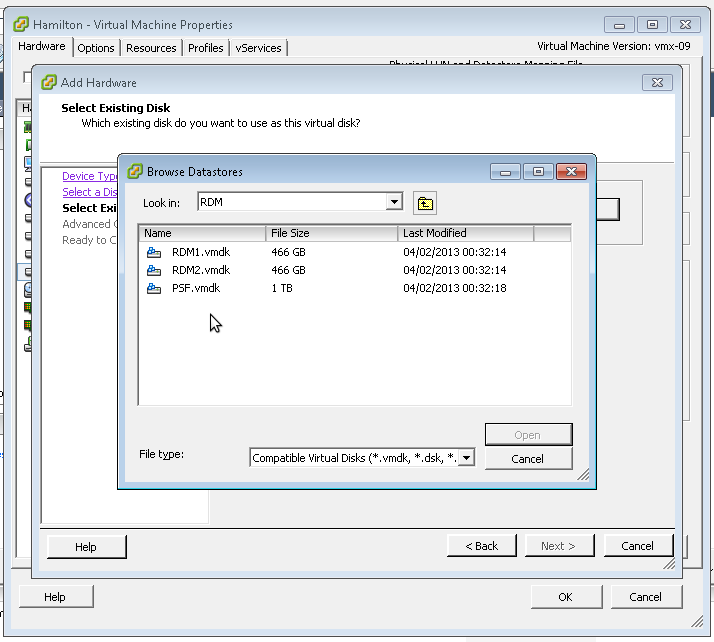
7. Add the RDM disk to your machine as follows

Note: I was able to access all existing data on the hard drive on the existing ext3 partition after mounting the disk in vm.

Credit for the info for this tutorial has to go to: http://vm-help.com/esx40i/SATA_RDMs.php

2013
02.16

MySQL Cheat Sheet

Show MySQL uptime:
mysqladmin version

Login to MySQL
mysql -h [hostname] -u [username] -p

Show databases
show databases;

Create database
create database [name];

Delete database
drop database [name];

Use database
use [database];

Show tables
show tables;

Show columns
show columns from [table];

Find and replace string
update [table_name] set [column_name] = replace([column_name],'[string_to_find]','[string_to_replace]');

Show users
SELECT user, host, password FROM mysql.user;

Create new user accessible only on localhost
CREATE USER '[User1]'@'localhost' IDENTIFIED BY '[password]';

Create new user accessible from anywhere
CREATE USER '[User1]'@'%' IDENTIFIED BY '[password]';

Grant permissions to all databases for User1 from localhost only
GRANT ALL PRIVILEGES ON *.* TO 'User1'@'localhost' WITH GRANT OPTION;

Grant permissions to specified database for User1 from anywhere
GRANT ALL PRIVILEGES ON [db_name].* TO 'User1'@'%' WITH GRANT OPTION;

Create a new user and grant permissions to database at once
GRANT ALL PRIVILEGES ON [db_name].* To 'user'@'hostname' IDENTIFIED BY '[password]';

Show users permissions
SHOW GRANTS FOR [username]@localhost;

To reset a users password see my earlier post here:
https://www.homecomputerlab.com/reset-mysql-root-user-password

Show MySQL Database sizes:
SELECT table_schema "DB Name", sum( data_length + index_length ) / 1024 / 1024 "DB Size in MB"
FROM information_schema.TABLES GROUP BY table_schema;

To backup and restore a mysql database see one of my earlier posts here:
https://www.homecomputerlab.com/backing-up-mysql-databases

ENABLE REMOTE ACCESS TO MYSQL DB
Edit /etc/my.cnf and locate line that reads as follows
[mysqld]

Make sure line skip-networking is commented (or remove line) and add the following line:
bind-address=[YOUR.SERVER.IP.ADDRESS]

For example, if your MySQL server IP is 10.10.10.1 the config should look like as follows:
[mysqld]
user = mysql
pid-file = /var/run/mysqld/mysqld.pid
socket = /var/run/mysqld/mysqld.sock
port = 3306
basedir = /usr
datadir = /var/lib/mysql
tmpdir = /tmp
language = /usr/share/mysql/English
bind-address = 10.10.10.1
# skip-networking

Also make sure you have access from outside for that user:
GRANT USAGE ON *.* TO '[User1]'@'%' IDENTIFIED BY '[password]';

2012
12.28


Install lighttpd and php5-cgi

apt-get install lighttpd
apt-get install php5-cgi

Enable the fastcgi module and the php configuration with

lighty-enable-mod fastcgi
lighty-enable-mod fastcgi-php

Reload the lighttpd daemon

service lighttpd force-reload

To test if it’s working create the file /var/www/index.php with the following contents:

<?php phpinfo(); ?>

Install sqlite and the php sqlite module

apt-get install sqlite3
apt-get install php5-sqlite

Install wordpress as usual, however ensure to use version 3.1.2 otherwise the PDO module wont work. Older versions of wordpress can be downloaded from their archives here: http://wordpress.org/download/release-archive/ alternatively wordpress version 3.1.2 can be downloaded directly here.

Next download the WordPress PDO (Sqlite) plugin from its official website here: http://wordpress.org/extend/plugins/pdo-for-wordpress/ or alternatively you can download the PDO plugin directly from here.

The instructions that follow next are directly from the official wordpress PDO plugin website:


So … to install PDO For WordPress please do the following:

Step 1: unzip the files in your wp-content directory. After unzipping the structure should look like this:

wp-content
->plugins
->themes
->pdo
db.php
index.php[maybe]

The key thing is the presence of the pdo directory and the db.php file in the ‘root’ of the wp-content directory.

Step 2: Edit your wp-config.php file so that this line of code is placed directly after the define(‘COLLATE’,”); line:

define('DB_TYPE', 'sqlite'); //mysql or sqlite

As part of the general wordpress installation you should define your secret keys too (in wp-config.php)


Once that is complete, you then need to edit the following file:
/var/www/wordpress/wp-content/pdo/wp_install.php

Search for the following line:

$message = __('<strong><em>Note that password</em></strong> carefully! It is a <em>random</em> password that was generated just for you.');

and replace it with the line below:

$message = __('<strong><em>Note that password</em></strong> carefully! It is a <em>random</em> password that was generated just for you.<br><br> ' . $random_password);

Once that’s complete you can then run the worpress installation script as usual from your web browser:

http://example.com/blog/wp-admin/install.php

Finally once you have logged into wordpress, all that remains is to update your wordpress installation to the latest version which should go through without an issue.

2012
11.13

Hit CTRL-ALT-SPACE and then let go of the SPACE (while continuing to hold the CTRL-ALT)
Then hit the virtual terminal you want to access F1-F7

2012
10.07

I finally got fed up of the noise coming from our loft this weekend and decided to put my Raspberry Pi to better use after the initial excitement from the Raspberry Pi had cooled off and it had been sitting unused for quite awhile. My old trusty 1U VIA EPIA5000 web server had served me well, but was starting to get a little noisy, the PSU fan was not sounding good and I can only assume this was due to it having been hosted in my dusty loft for the past few years which really isn’t the best environment for a server to be running 24×7. The migration across to the Raspberry pi was a really simple one, backup the webroot directory and mysql db and scp across to the pi. Job done. Now all is blissfully silent downstairs in the house once more. Currently my pi is running a minimal Debian wheezy image I came across here http://www.linuxsystems.it/2012/06/debian-wheezy-raspberry-pi-minimal-image/ which works a treat using ~20MB Ram after a reboot. I have however noticed that web pages do now seem to load a little bit slower that on my old web server, especially when loading image files. I’m still running Apache and mysql, but may investigate migrating across to lighttpd and SQLite in the near future to try and speed things up a bit. All in all though I’m pretty happy with the pi running as my new web server and also happy that I’ve put it to better use. This of course now means that I will need to order a 2nd Raspberry pi, at £25 it doesn’t really matter if I don’t get the time to play with it all that much and it just sits in the corner, at the very least I will have a ‘hot spare’ web server. Now I just need to figure out what to do with the old web server?

2012
08.27

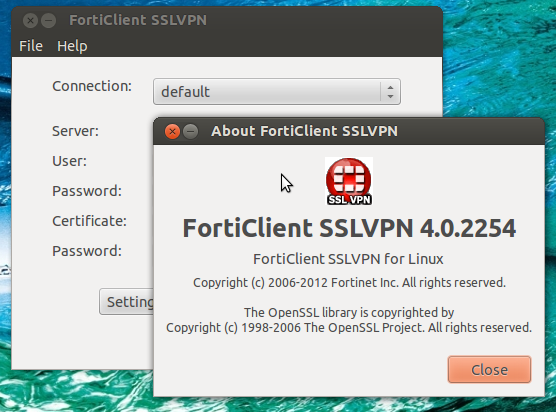
The Fortinet linux SSL VPN client install is really simple. The only issue I had after installing the client on Ubuntu 12.04 64bit was that my VPN profiles were not saving, so every time I relaunched the VPN client I would have to manually enter/re-create my VPN profile. For some reason the .fctsslvpnhistory file that contains the profile settings was not being saved to my home folder. In case this happens to you you can manually create the file in your home folder with the following settings:

version=2
proxyserver=
proxyport=
proxyuser=
proxypasswd=
current=DEFAULT_PROFILE_NAME
keepalive=0
autostart=0
profile=PROFILE_NAME
server=IP_ADDRESS
port=10443
user=USERNAME
password=HASHED_PASSWORD
path=
p12passwd=

Fortinet Fortigate SSL VPN Download:
forticlientsslvpn_linux_4.0.2010.tar.gz
forticlientsslvpn_linux_4.0.2012.tar.gz
forticlientsslvpn_linux_4.0.2082.tar.gz
forticlientsslvpn_linux_4.0.2254.tar.gz
Forticlient_Windows_SSLVPN_4.0.2250.zip

2012
08.12

DEFINE THE VPN POLICIES AND TRAFFIC
crypto iskamp policy 1
authentication pre-share
exit
crypto isakmp key <PRE-SHARED KEY> address <HOST WE ARE CONNECTING TO>
access-list 123 permit ip <SOURCE SUBNET> 0.0.0.255 <DESTINATION SUBNET> 0.0.0.255
crypto ipsec transform-set 3DESSHA esp-3des esp-sha-hmac
exit

CREATE THE VPN USING THE DEFINED POLICIES AND TRAFFIC ACL
crypto map CRYPTO_MAP_NAME_ABC 1 ipsec-isakmp
set transform-set 3DESSHA
set peer <IP OF HOST CONNECTING TO>
match address 123
exit

APPLY THE VPN TUNNEL TO THE DESTINATION INTERFACE
interface Dialer1
crypto map CRYPTO_MAP_NAME_ABC
end

DO NOT NAT THE TRAFFIC THAT NEEDS TO BE TUNNELLED
ip access-list extended acl_nat
deny   ip 192.168.1.0 0.0.0.255 192.168.0.0 0.0.0.255
permit ip 192.168.1.0 0.0.0.255 any

SHOW COMMANDS
show crypto isakmp sa
show crypto map

2012
07.22

I recently installed citrix receiver on Ubuntu 12.04 64bit and receiver the following error:
URL: http://www.citrix.com/English/ss/downloads/results.asp?productID=1689163

Unpacking icaclient (from .../icaclient_12.1.0_amd64.deb) ...
Setting up icaclient (12.1.0) ...
dpkg: error processing icaclient (--install):
subprocess installed post-installation script returned error exit status 2
Processing triggers for menu ...
Errors were encountered while processing:

In order to resolve this error and complete the install, I followed the steps below straight from the citrix forum post here:
http://forums.citrix.com/thread.jspa?threadID=306353&tstart=0

sudo nano /var/lib/dpkg/info/icaclient.postinst

Replace the line that says:
echo $Arch|grep "i[0-9]86" >/dev/null with
echo $Arch|grep -E "i[0-9]86|x86_64" >/dev/null

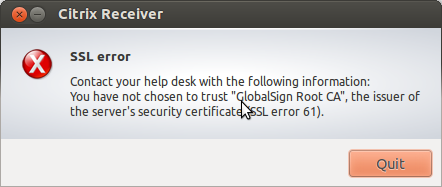
Once I had successfully installed the citrix xenapp receiver client I was then ready to run my apps. Unfortunately, I then received the following error:

I have been playing around with ssl security certificates quite a bit recently and I was able to quickly find out where citrix stores it’s trusted certificates from the following forum post: http://forums.citrix.com/thread.jspa?threadID=296396 I saved a copy of my ssl certificate to /opt/Citrix/ICAClient/keystore/cacerts and everything then worked as expected.

Note, after a bit of further reading, it seems a lot of people use the following command to create a symbolic link to their browsers trusted certificate repository which seems a much better way of managing your citrix receiver trusted certificates.

sudo ln -s /usr/share/ca-certificates/mozilla/* /opt/Citrix/ICAClient/keystore/cacerts

UPDATE: Once I had successfully completed installing the citrix receiver app on my pc and had tested that all was working ok, I noticed that I would still receive the following error  every time after running any updates:

Setting up icaclient (12.1.0) ...
dpkg: error processing icaclient (--configure):
subprocess installed post-installation script returned error exit status 2
E: Sub-process /usr/bin/dpkg returned an error code (1)

To remove this annoying message you can simply edit the following file: /var/lib/dpkg/status Search for the line that contains “Package: icaclient” and  change the status from: “install ok half-configured” to “install ok installed”

2012
07.10

In preparation for building my vmware environment I created a linux software raid array for my iscsi SAN which is used to host my guest vm’s.  This is a basic guide on how to create and manage linux software raid arrays. Old hardware is really cheap these days plus I always have a few spares lying around, here’s a picture of the hardware I have running my raid arrays/SAN.

Create a new raid array:
sudo mdadm --create --verbose /dev/md2 --level=1 --raid-devices=2 /dev/sde /dev/sdf

Add raid config to mdadm config file so the array will be recognised after a reboot:
mdadm --detail --scan >> /etc/mdadm/mdadm.conf

See the raid array status:
cat /proc/mdstat
mdadm --detail /dev/md2

Monitor the status of an array rebuild:
watch cat /proc/mdstat

Only a failed drive can be removed from an array:
mdadm --fail /dev/md2 /dev/sdf

Remove the failed drive:
mdadm --remove /dev/md2 /dev/sdf

Convert a 2 drive RAID1 array into a degraded RAID5 array:
mdadm --grow /dev/md2 --level=5

Add a new drive to the array:
mdadm --add /dev/md2 /dev/sdg
Then we need to grow the array to get a clean state for the array:
mdadm --grow /dev/md2 --raid-devices=3

Add online hot spares:
mdadm --add /dev/md2 /dev/sd[hi]

Stop the array:
mdadm --stop /dev/md2

Delete the array:
mdadm --remove /dev/md2
sudo nano /etc/mdadm/mdadm.conf

Delete the superblocks from the individual drives:
mdadm --zero-superblock /dev/sd[efghi]

Detecting an array that failed to start:
mdadm --assemble --scan

2012
06.24

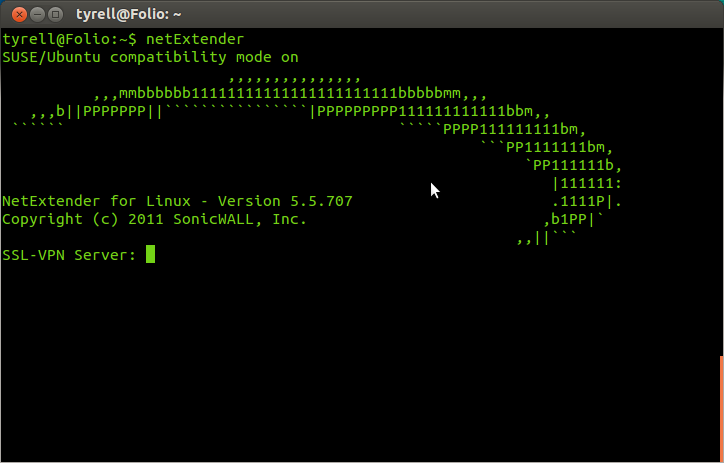
I recently installed the SonicWALL NetExtender VPN client on a new laptop running Ubuntu 12.04 to do some work over the weekend and received an error during the install. I guess this probably shouldn’t’ve come as a surprise, although the NetExtender VPN client had installed without issue on the previous LTS version of Ubuntu 10.04.  Below is a copy of the dependency error I received:

--- SonicWALL NetExtender 5.5.707 Installer ---
Checking library dependencies...
Missing library: libssl.so.6
No compatible version found.

I ran the following command to find an updated version of the libraries already installed on Ubuntu 12.04.

find / -iname libssl*

I then ran the following commands to create symbolic links to the missing dependencies:

sudo ln -s /lib/i386-linux-gnu/libssl.so.1.0.0 /usr/lib/libssl.so.6
sudo ln -s /lib/i386-linux-gnu/libcrypto.so.1.0.0 /usr/lib/libcrypto.so.6

UPDATE: I recently reinstalled/upgraded to Ubuntu 12.04 64bit, here are the commands needed for the 64bit install:

sudo ln -s /lib/x86_64-linux-gnu/libssl.so.1.0.0 /usr/lib/libssl.so.6
sudo ln -s /lib/x86_64-linux-gnu/libcrypto.so.1.0.0 /usr/lib/libcrypto.so.6

You can download the linux SonicWall NetExtender SSL VPN clients here:

32bit: NetExtender.Linux.5.5.707.x86.tgz
64bit: NetExtender.Linux.5.5.707.x86_64.tgz